
| 일 | 월 | 화 | 수 | 목 | 금 | 토 |
|---|---|---|---|---|---|---|
| 1 | 2 | 3 | 4 | |||
| 5 | 6 | 7 | 8 | 9 | 10 | 11 |
| 12 | 13 | 14 | 15 | 16 | 17 | 18 |
| 19 | 20 | 21 | 22 | 23 | 24 | 25 |
| 26 | 27 | 28 | 29 | 30 | 31 |
- 스프링부트
- node.js
- java
- django
- python3
- 데이터베이스
- 자료구조
- Python
- 파이썬3
- Spring Boot
- 웹 개발
- 자바
- bytecode
- JPA
- 스프링 부트
- HTTP
- 디자인 패턴
- ORM
- mysql
- rabbitmq
- 개발
- 보안
- db
- 장고
- 안드로이드
- BCI
- 스프링
- 웹
- 파이썬
- Spring
- Today
- Total
semtax의 개발 일지
디자인패턴 공부내용 정리 : 빌더 패턴 본문
개요
이번 포스팅에서는, 생성 패턴 중에 하나인 빌더패턴에 대해 알아보도록 하겠습니다.
왜 나오게 됬는가?
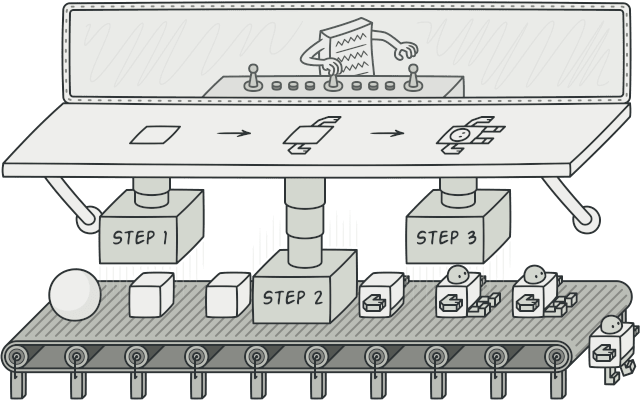
이 패턴같은 경우, 복잡한 객체를 생성할때 초기화를 단계별(step-by-step)로 해야 할 때, 어떻게 깔끔하게 코드를 작성할 수 있을까를 고민하다 나온 패턴입니다.
대표적인 예로 자동차 조립, 피자 만들기가 있습니다.
이제 실제 예제로 어떤 문제가 있는지 알아보도록 합시다.
문제 상황
먼저 피자 라는 객체를 만든다고 가정을 해봅시다. 피자에는, 올리브 토핑도 들어 갈 수 있고, 페퍼로니 토핑도 들어 갈 수 있고, 피망, 채소도 들어갈 수 있고 고기도 들어갈 수 있습니다.
하지만, 저 재료들을 무조건 넣어야 되는게 아니고, 선택적으로 넣을 수 있습니다.
일단 가장 단순한 방법은 저 위의 케이스를 모두 커버하는 생성자를 만드는것 입니다.
하지만 그런 경우 코드가 아래와 같이 정말로 지저분하게 나오게 됩니다.
public class Pizza {

  private String pepperoni;
  private String paprika;
  private String meat;
  private String olive;
  private String cheese;
  private String bread;

  public Pizza() {

  }

  public Pizza(String bread) {
    this.bread = bread;
  }

  public Pizza(String bread, String cheese) {
    this.bread = bread;
    this.cheese = cheese;
  }

  ...

}
그렇다면 이러한 문제를 어떻게 해결 할 수 있을까요?
해결법
사실 이러한 상황에서, 해결법은 아래와 같습니다.
먼저, 위에서 선언했던 모든 생성자들을, 빌더 라는 별도의 클래스로 추출 합니다.
여기서, 추출한 각 생성자들을 빌더 클래스의 메소드로 만듭니다. 이때, 빌더 클래스의 메서드들이 빌더 객체 자신을 리턴하게 해서 위에서 선언한 함수들을 연속적으로 호출 할 수 있게 하는 방식으로 구현합니다.
마지막으로, build 메소드를 호출하면 실제로 빌더 클래스에 의해 생성된 객체를 돌려주게 됩니다.
구현
먼저 아래와 같이 모든 초기화할 인자를 받는 생성자를 하나 만들어 줍시다.
public class Pizza {

  private String pepperoni;
  private String paprika;
  private String meat;
  private String olive;
  private String cheese;
  private String bread;

  public Pizza(String bread, String cheese, String pepperoni, String paprika, String meat, String olive) {
    this.bread = bread;
    this.cheese = cheese;
    this.pepperoni = pepperoni;
    this.paprika = paprika;
    this.meat = meat;
    this.olive = olive;
  }
}
그리고 나서 아래와 같이 클래스를 생성해주는 빌더 클래스를 만들어 줍시다.
public class PizzaBuilder {

  private String pepperoni;
  private String paprika;
  private String meat;
  private String olive;
  private String cheese;
  private String bread;

  public PizzaBuilder(String bread, String cheese) {
    this.bread = bread;
    this.cheese = cheese;
  }

  public PizzaBuilder addPaprika(String paprika) {
    this.paprika = paprika;
  }


  public PizzaBuilder addMeat(String meat) {
    this.meat = meat;
  }

  public PizzaBuilder addOlive(String olive) {
    this.olive = olive;
  }

  public PizzaBuilder addPepperoni(String pepperoni) {
    this.pepperoni = pepperoni;
  }

  public Pizza build(){
    return new Pizza(this.bread, this.cheese, this.pepperoni, this.paprika, this.meat, this.olive);
  }
}
위와 같이, 객체 자신을 리턴해주는 함수들을 만들어서 chaining 하게 함수를 호출해줄 수 있게 하는 아이디어를 사용해서 객체에 값을 설정하게 됩니다.
그리고 나서, build() 함수를 통해서 실제로 객체를 생성하게 됩니다.
사용은 대략 아래와 같이 하면 됩니다.
public class Main {

  public static void main(String[] args) {
    PizzaBuilder builder = new PizzaBuilder("crust","pamasan");
    Pizza nicePizza = builder.addPaprika("yellow paprika")
      .addMeat("cow meat")
      .addOlive("black olive")
      .addPepperoni("red pepperoni")
      .build();
  }
}
예시
일단 해당 패턴을 적용한 예시는 많지만, 일단 (안드로이드 개발자 기준으로) 많이 사용해봤던 예제는 Retrofit2 이 아닌가 생각해봅니다.
https://square.github.io/retrofit/
보통 아래 코드와 같이 사용합니다.
public interface GitHubService {
  @GET("users/{user}/repos")
  Call<List<Repo>> listRepos(@Path("user") String user);
}

...

Retrofit retrofit = new Retrofit.Builder()
    .baseUrl("https://api.github.com/")
    .build();

GitHubService service = retrofit.create(GitHubService.class);
위의 URL에서 볼수 있다시피, Retrofit과 같은 경우 Interceptor 설정도 가능하고, 데이터 직렬화/역직렬화 를 할때 JSON 파서를 쓸지, GSON 파서를 쓸지도 고를 수 있습니다.
하지만, 모든 옵션을 필수로 써야되는게 아니기 때문에, 엄청나게 많은 생성자를 만들어야 되는 문제가 생기게 됩니다.
이때, 위에서 설명했던 빌더 패턴을 사용하는 경우 위와같이 깔끔하게 해결 가능합니다.
출처
- 이펙티브 자바(Effective Java) 3판
- Pattern-Oriented Software Architecture, Volume 1
'개발 > Java' 카테고리의 다른 글
| 디자인패턴 공부내용 정리 : 브로커 패턴 (1) | 2020.05.17 |
|---|---|
| 디자인패턴 공부내용 정리 : 싱글톤 패턴 (0) | 2020.05.16 |
| 스프링부트 에서 카프카 써서 메시지 주고 받아보기 (4) | 2020.05.16 |
| 자바 Uncaught Exception 캐치 하기 (0) | 2020.05.05 |
| 스프링부트로 게시판 만들기 12(完) : API 문서 생성 자동화 (0) | 2020.05.02 |

