semtax의 개발 일지
스프링부트로 게시판 만들기 5 : 회원가입 기능 추가 본문
개요
이번 포스팅에서는 회원가입 기능을 추가해보도록 하겠다.
설계
먼저 회원 정보는 간단하게 아래의 데이터만을 가지고 수행하도록 한다.
- 아이디
- 패스워드
- 이메일
회원 가입 기능은 대략적으로 아래와 같은 흐름을 따라서 만들어 진다.
- 사용자가 서버에 회원 정보를 전송한다.
- 서버는 회원 정보를 받고 아래와 같은 작업을 수행한다.
- 먼저 데이터베이스에 중복된 아이디가 있는지 확인 한다.
- 만약 중복된 아이디가 있는 경우, 이미 있는 회원이라 가입이 안된다는 메시지를 보낸다.
- 그렇지 않은 경우 전달 받은 데이터를 데이터베이스에 추가 한다.
- 이때, 전달받은 패스워드를 해싱해서 저장한다.
- 회원가입을 성공했다는 메시지를 전달한다.
구현
먼저 아래와 같이 실제 회원 정보에 해당하는 Account Entity를 추가 해 보도록 하자.
package com.semtax.application.entity;

import javax.persistence.Entity;
import javax.persistence.GeneratedValue;
import javax.persistence.Id;
import java.util.Objects;

@Entity
public class Account {

    @Id @GeneratedValue
    private Long id;

    private String username;
    private String email;
    private String password;

    public Long getId() {
        return id;
    }

    public void setId(Long id) {
        this.id = id;
    }

    public String getUsername() {
        return username;
    }

    public void setUsername(String username) {
        this.username = username;
    }

    public String getEmail() {
        return email;
    }

    public void setEmail(String email) {
        this.email = email;
    }

    public String getPassword() {
        return password;
    }

    public void setPassword(String password) {
        this.password = password;
    }

    @Override
    public boolean equals(Object o) {
        if (this == o) return true;
        if (o == null || getClass() != o.getClass()) return false;
        Account account = (Account) o;
        return id.equals(account.id) &&
                username.equals(account.username) &&
                email.equals(account.email) &&
                password.equals(account.password);
    }

    @Override
    public int hashCode() {
        return Objects.hash(id, username, email, password);
    }
}
그리고 나서, 아래와 같이 실제 데이터베이스에 회원 정보를 저장/조회하는 로직을 구현 한다.
package com.semtax.application.repository;

import com.semtax.application.entity.Account;
import org.springframework.data.jpa.repository.JpaRepository;

public interface AccountRepository extends JpaRepository<Account,Long> {

    public Account findByUsername(String username);
    public Account findByUsernameAndPassword(String username, String password);
}
스프링 데이터 JPA는 위와 같이, 메소드 이름을 스프링 데이터 JPA 규칙에 맞게 지어주면 해당 Entity에 맞게 데이터를 조회/조작 하는 코드를 자동으로 생성해주게 된다.
(물론 비즈니스 로직이 복잡해지면 레포지토리 코드를 직접 작성해야 한다)
추가적으로, 회원가입 정보를 받기위한 DTO 데이터도 작성해주도록 하자.
package com.semtax.application.dto;

public class AccountDTO {

    private String username;
    private String password;

    public String getUsername() {
        return username;
    }

    public void setUsername(String username) {
        this.username = username;
    }

    public String getPassword() {
        return password;
    }

    public void setPassword(String password) {
        this.password = password;
    }
}
그런 뒤, 회원가입 컨트롤러 코드를 아래와 같이 작성해준다.
package com.semtax.application.controller;


import com.semtax.application.entity.Account;
import com.semtax.application.repository.AccountRepository;
import com.semtax.application.util.Hashing;
import org.springframework.beans.factory.annotation.Autowired;
import org.springframework.stereotype.Controller;
import org.springframework.web.bind.annotation.*;

@Controller
public class UserRegisterController {

    @Autowired
    AccountRepository accountRepository;

    @CrossOrigin(origins = "*", allowedHeaders = "*")
    @PostMapping("/register")
    @ResponseBody
    public String registerUser(@RequestBody Account newAccount) {

        String username = newAccount.getUsername();
        String password = Hashing.hashingPassword(newAccount.getPassword());
        String email = newAccount.getEmail();

        if(username.equals("") || password.equals("") || email.equals(""))
            return "failed";

        Account account = new Account();
        account.setUsername(username);
        account.setPassword(password);
        account.setEmail(email);

        if(accountRepository.findByUsername(username) != null)
            return "failed";

        accountRepository.save(account);

        return "success";
    }
}
위의 코드에서 전달받은 패스워드를 해싱해주는것을 알 수 있다.
이렇게 하는 이유는 이를 통해 만약 데이터베이스가 도난 당하더라도(그러면 안되기는 하지만),
패스워드 자체를 가지고 있는것은 아니기 때문에, 상대적으로 피해가 덜하게 된다.
(결국 탈취한 사람이 패스워드를 알아내기 까지에 시간이 소요되므로)
그리고, 실제로 해싱해주는 래퍼 클래스를 추가해주자.
public class Hashing {

    public static final String SALT = "!@salt$%^&";

    public static String hashingPassword(String input) {

        try {
            MessageDigest md = MessageDigest.getInstance("SHA-256");
            byte[] hashData = md.digest(input.getBytes(StandardCharsets.UTF_8));
            BigInteger number = new BigInteger(1, hashData);
            StringBuilder hexString = new StringBuilder(number.toString(16));

            while (hexString.length() < 32) {
                hexString.insert(0, '0');
            }
            return hexString.toString();
        }catch(NoSuchAlgorithmException e) {
            return input;
        }
    }
}
추가 과제(?)
사실 위의 코드는 그렇게 까지 좋은 코드는 아니다. 왜냐하면 컨트롤러에 실제 회원가입을 처리하는 로직과 다른 로직들이 섞여있기 때문이다.
나중에 시간이 나면 저 위에 있는 회원 가입 코드를 서비스 영역으로 빼보는걸 해보는것도 좋을것 같다.
테스트
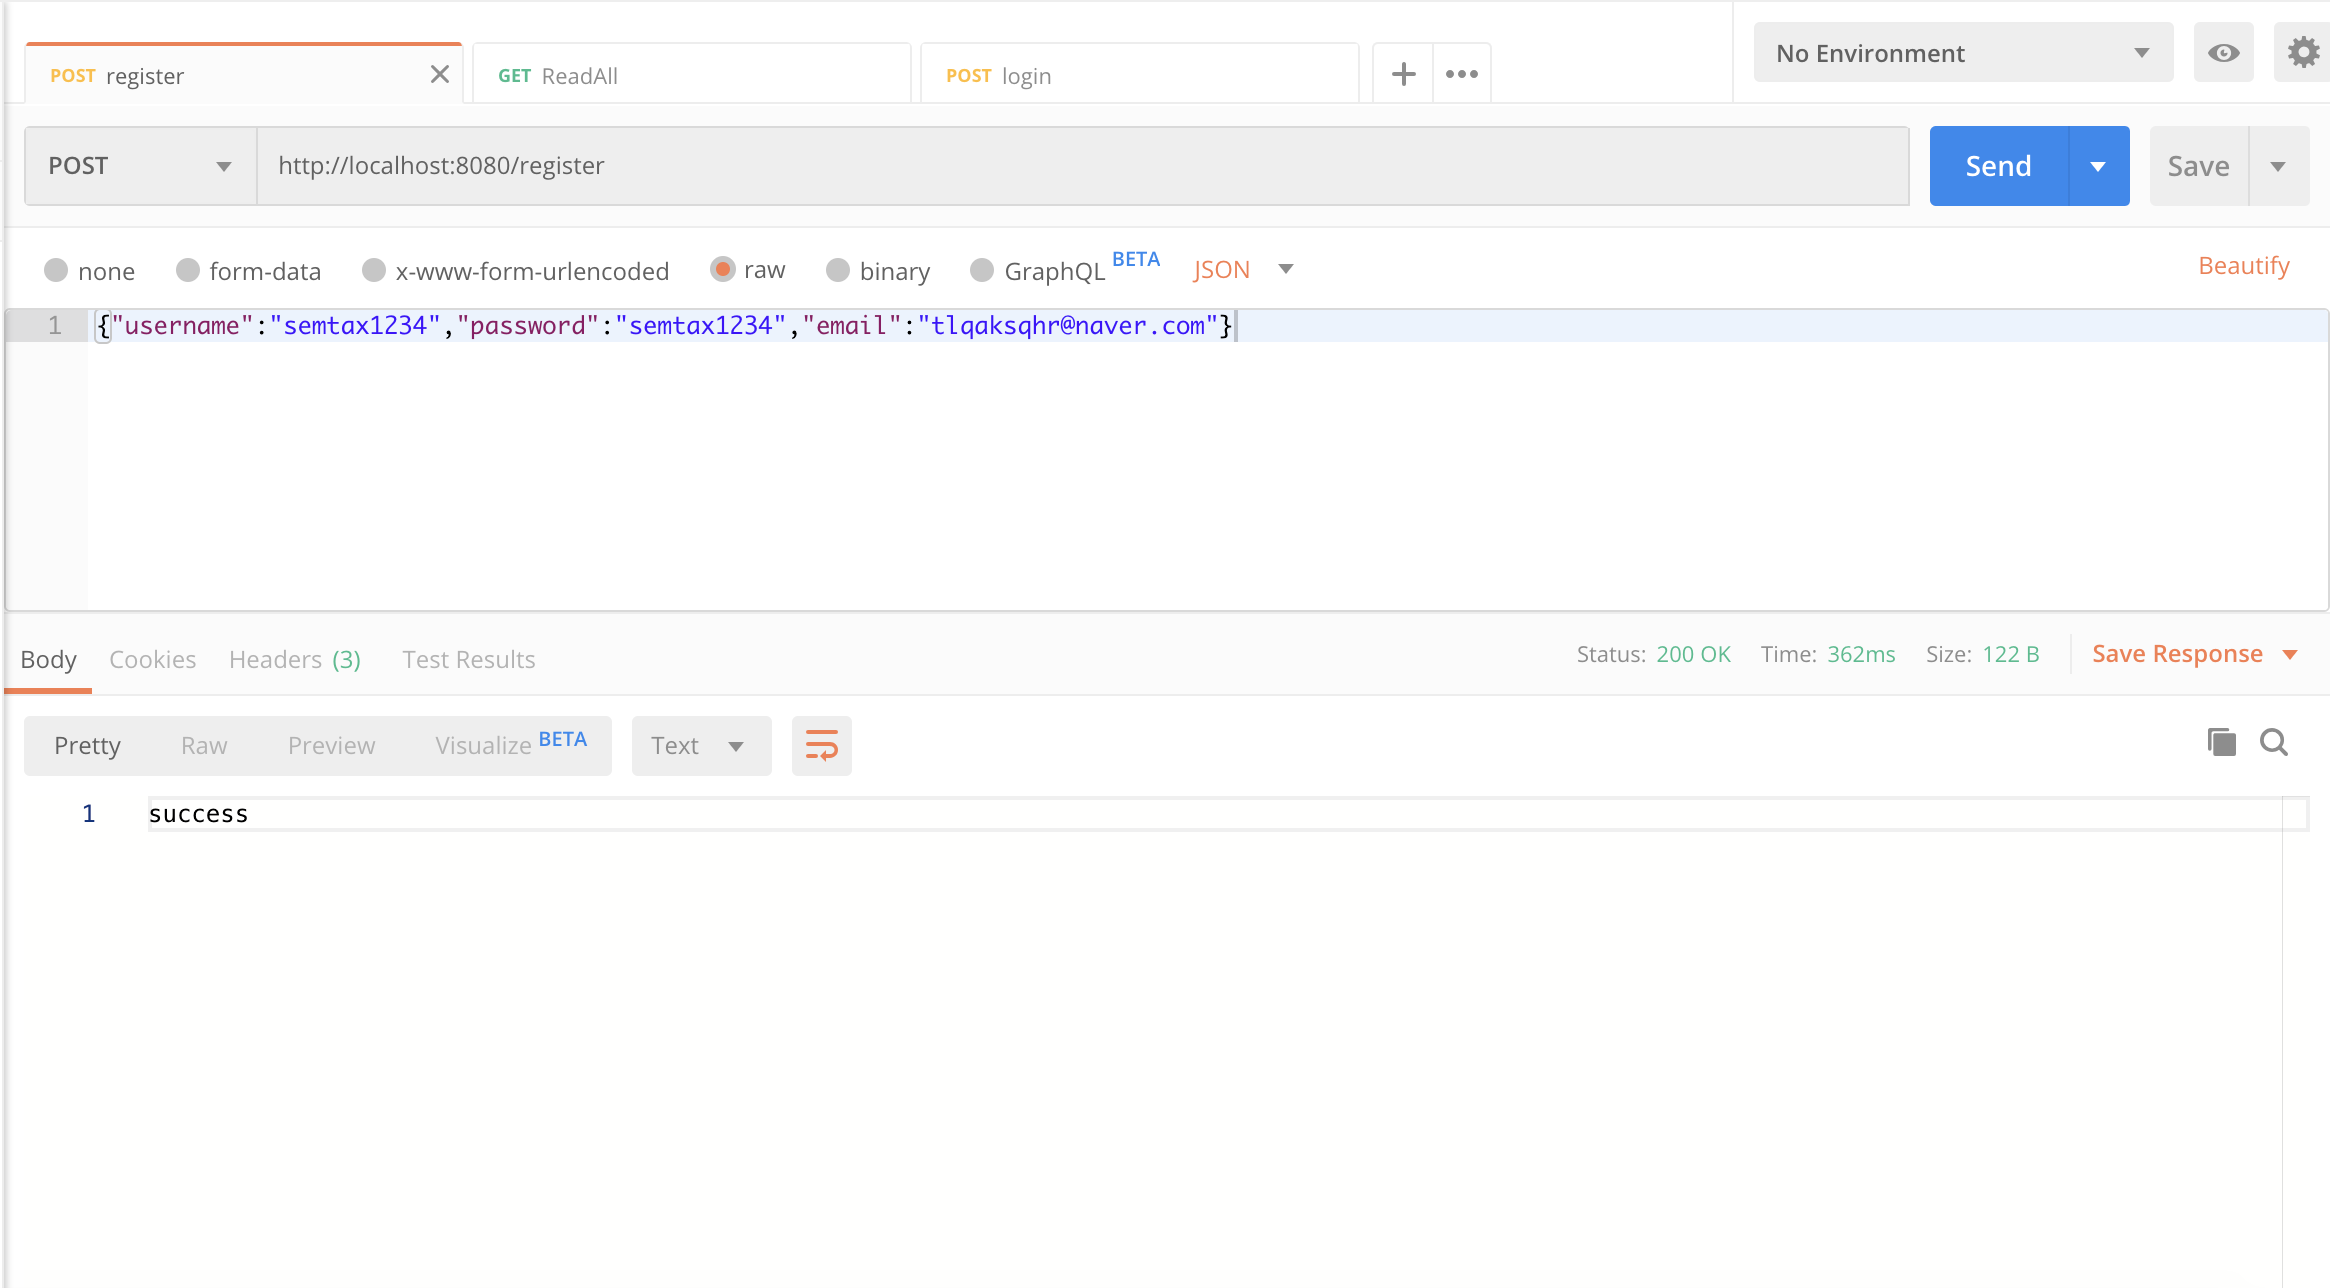
Postman을 켜서 테스트를 해보자.
먼저 Postman을 켜서 아래와 같이 회원가입 요청을 보내 주자.

다음으로, DB를 확인해보자.

정상적으로 들어오는것을 확인 할 수 있다.
결론
일단, 이번 포스팅에서는 회원 가입 만 하는 기능을 구현하였다.
사실 회원 가입 기능 만 있는 경우는, 접근 권한 제어나 접근 권한 부여를 하지 않으므로 그다지 의미가 없다.
다음 포스팅에서는 로그인 기능을 구현 하면서, 저 접근 권한을 어떠한 방식으로 구현하는지 알아보도록 하겠다.
'개발 > Java' 카테고리의 다른 글
| 스프링부트로 게시판 만들기 7 : 데이터 Auditing (0) | 2020.05.01 |
|---|---|
| 스프링부트로 게시판 만들기 6 : 로그인 기능 추가 (4) | 2020.05.01 |
| 스프링부트로 게시판 만들기 4 : JPA 매핑 기능을 이용해 댓글 기능 추가하기 (0) | 2020.02.26 |
| 스프링부트로 게시판 만들기 3 : 스프링 예외처리 (2) | 2020.01.23 |
| 자바 및 스프링에 관한 여러가지 정보들이 있는 사이트 (0) | 2020.01.23 |


