JPA를 이용해서 RDB에 공간정보 저장하기
개요
이번 포스팅에서는 JPA를 이용해서 MySQL에 위치정보를 저장하는 법에 대해서 다뤄보도록 하겠다.
공간 정보(Geometry 타입)?
MySQL(사실, 다른 RDB에서도) 에서는, GPS좌표나 다각형과 같은 공간/기하 데이터를 저장할 수 있는 Geometry 타입을 제공한다.
MySQL과 같은 경우 아래 목록의 타입들을 제공한다
| 데이터 타입 | 설명 |
| Point | 좌표 공간에서 한 지점의 위치를 표시 [ Ex : Point(10,10) ] |
| LineString | 다수의 점을 연결해주는 선분 [ Ex : LINESTRING(10 10, 20 25, 15 40) ] |
| Polygon | 다수의 선분들이 연결되있는 다각형 [ Ex : POLYGON(10 10, 10 20, 20 20, 20 10, 10 10) ] |
| Multi-Point | 다수개의 점들의 집합 [ Ex : MULTIPOINT(10 10, 30 20) ] |
| Multi-LineString | 다수개의 선분들의 집합 [ Ex : MULTILINESTRING((10 10, 20 25, 15 40), (50 50, 85 105, 120 160)) ] |
| Multi-Polygon | 다수개의 다각형들의 집합 [ Ex : MULTIPOLYGON((10 10, 10 20, 20 20, 20 10, 10 10), (10 10, 10 20, 20 20, 20 10, 10 10)) ] |
| GeomCollection | 모든 공간데이터들의 집합 [ Ex : GEOMCOLLECTION(POINT(10,10), LINESTRING(10 10, 20 25, 15 40)) ] |
이제 이러한 공간정보를 스프링에서 제공하는 ORM인 JPA(+hibernate)를 이용해서 저장해보는 예제를 작성해보자.
해당 예제에서는 Point(위도/경도) 정보를 저장/불러오는 예제를 다루도록 하겠다.
예제
먼저 스프링 프로젝트를 만들고 아래와 같이 Maven에 의존성을 추가해주자.
<?xml version="1.0" encoding="UTF-8"?>
<project xmlns="http://maven.apache.org/POM/4.0.0"
         xmlns:xsi="http://www.w3.org/2001/XMLSchema-instance"
         xsi:schemaLocation="http://maven.apache.org/POM/4.0.0 http://maven.apache.org/xsd/maven-4.0.0.xsd">
    <modelVersion>4.0.0</modelVersion>

    <groupId>com.semtax.geometryexample</groupId>
    <artifactId>geometryexample</artifactId>
    <version>1.0-SNAPSHOT</version>

    <dependencies>
        <dependency>
            <groupId>org.springframework.boot</groupId>
            <artifactId>spring-boot-starter-web</artifactId>
            <version>2.1.6.RELEASE</version>
        </dependency>
        <dependency>
            <groupId>org.springframework.boot</groupId>
            <artifactId>spring-boot-starter-data-jpa</artifactId>
            <version>2.1.6.RELEASE</version>
        </dependency>
        <dependency>
            <groupId>com.h2database</groupId>
            <artifactId>h2</artifactId>
            <scope>test</scope>
            <version>1.4.199</version>
        </dependency>
        <dependency>
            <groupId>org.springframework.boot</groupId>
            <artifactId>spring-boot-starter-test</artifactId>
            <version>2.1.6.RELEASE</version>
            <scope>test</scope>
        </dependency>
        <dependency>
            <groupId>org.hibernate</groupId>
            <artifactId>hibernate-spatial</artifactId>
            <version>5.3.10.Final</version>
        </dependency>
        <dependency>
            <groupId>org.projectlombok</groupId>
            <artifactId>lombok</artifactId>
            <version>1.18.8</version>
        </dependency>
        <dependency>
            <groupId>com.github.gavlyukovskiy</groupId>
            <artifactId>p6spy-spring-boot-starter</artifactId>
            <version>1.5.7</version>
        </dependency>
        <dependency>
            <groupId>mysql</groupId>
            <artifactId>mysql-connector-java</artifactId>
            <version>8.0.19</version>
        </dependency>
        <dependency>
            <groupId>ch.vorburger.mariaDB4j</groupId>
            <artifactId>mariaDB4j</artifactId>
            <version>2.2.3</version>
        </dependency>
    </dependencies>

    <build>
        <sourceDirectory>src</sourceDirectory>
        <plugins>
            <plugin>
                <artifactId>maven-compiler-plugin</artifactId>
                <version>3.1</version>
                <configuration>
                    <source>1.8</source>
                    <target>1.8</target>
                </configuration>
            </plugin>
            <plugin>
                <groupId>org.springframework.boot</groupId>
                <artifactId>spring-boot-maven-plugin</artifactId>
            </plugin>

            <plugin>
                <groupId>org.apache.maven.plugins</groupId>
                <artifactId>maven-surefire-plugin</artifactId>
                <version>2.22.0</version>
            </plugin>
        </plugins>
    </build>

</project>
공간 데이터 저장을 위해 hibernate의 hibernate-spatial 라이브러리를 의존성으로 추가했다.
해당 라이브러리의 버전은 스프링부트의 hibernate 버전에 맞춰주면 된다.
다음으로 아래와 같이 application.properties 를 작성해준다.
spring.datasource.hikari.maximum-pool-size=10

spring.datasource.url=jdbc:mysql://localhost:3306/testdb?useSSL=false&allowPublicKeyRetrieval=true&characterEncoding=UTF-8&serverTimezone=UTC
spring.datasource.username=root
spring.datasource.password=root

spring.jpa.hibernate.use-new-id-generator-mappings=false

spring.jpa.hibernate.ddl-auto=create
spring.jpa.properties.hibernate.jdbc.lob.non_contextual_creation=true
spring.jpa.properties.hibernate.dialect=org.hibernate.spatial.dialect.mysql.MySQL56InnoDBSpatialDialect
spring.jpa.properties.hibernate.current_session_context_class=org.springframework.orm.hibernate5.SpringSessionContext

server.port=45000
먼저 MySQL 8 이상을 쓰는 경우 위와 같이 datasource.url을 작성해야 에러가 발생하지 않는다.
(기본적으로 SSL 통신을 사용함 + UTC 시간 지정이 필요)
그리고, JPA 구현체로 hibernate를 사용하겠다는 설정과, 기타 설정들을 지정해준다.
다음으로 아래와 같이 위치정보가 포함된 Entity 객체를 작성해준다.
package main.java.entity;

import org.springframework.data.geo.Point;

import javax.persistence.Entity;
import javax.persistence.GeneratedValue;
import javax.persistence.Id;
import java.util.Objects;

@Entity
public class PointEntry {

    @Id
    @GeneratedValue
    private Long id;

    private Point point;

    public PointEntry() {
    }

    public PointEntry(Point point) {
        this.point = point;
    }

    public Long getId() {
        return id;
    }

    public void setId(Long id) {
        this.id = id;
    }

    public Point getPoint() {
        return point;
    }

    public void setPoint(Point point) {
        this.point = point;
    }

    @Override
    public boolean equals(Object o) {
        if (this == o) return true;
        if (o == null || getClass() != o.getClass()) return false;
        PointEntry that = (PointEntry) o;
        return Objects.equals(id, that.id) &&
                Objects.equals(point, that.point);
    }

    @Override
    public int hashCode() {
        return Objects.hash(id, point);
    }
}
그리고 나서, 위에서 선언한 엔티티(개체)에 대한 Repository 를 작성해준다.
package main.java.repositories;


import main.java.entity.PointEntry;
import org.springframework.data.jpa.repository.JpaRepository;
import org.springframework.stereotype.Repository;

@Repository
public interface PointEntryRepository extends JpaRepository<PointEntry, Long> {
}
다음으로, 실제 위치정보를 저장하고 불러오는 컨트롤러들을 작성해준다.
package main.java.controller;


import main.java.entity.PointEntry;
import main.java.repositories.PointEntryRepository;
import org.springframework.beans.factory.annotation.Autowired;
import org.springframework.data.geo.Point;
import org.springframework.web.bind.annotation.GetMapping;
import org.springframework.web.bind.annotation.RestController;

import java.util.List;
import java.util.Random;


@RestController
public class TestController {
    @Autowired
    PointEntryRepository pointEntryRepository;

    @GetMapping("/")
    public List<PointEntry> mainPage(){
        return pointEntryRepository.findAll();
    }

    @GetMapping("/insert")
    public String insertPage(){
        Random r = new Random();

        PointEntry pointEntry = new PointEntry(new Point(r.nextDouble(),r.nextDouble()));
        pointEntryRepository.save(pointEntry);
        return "success";
    }
}
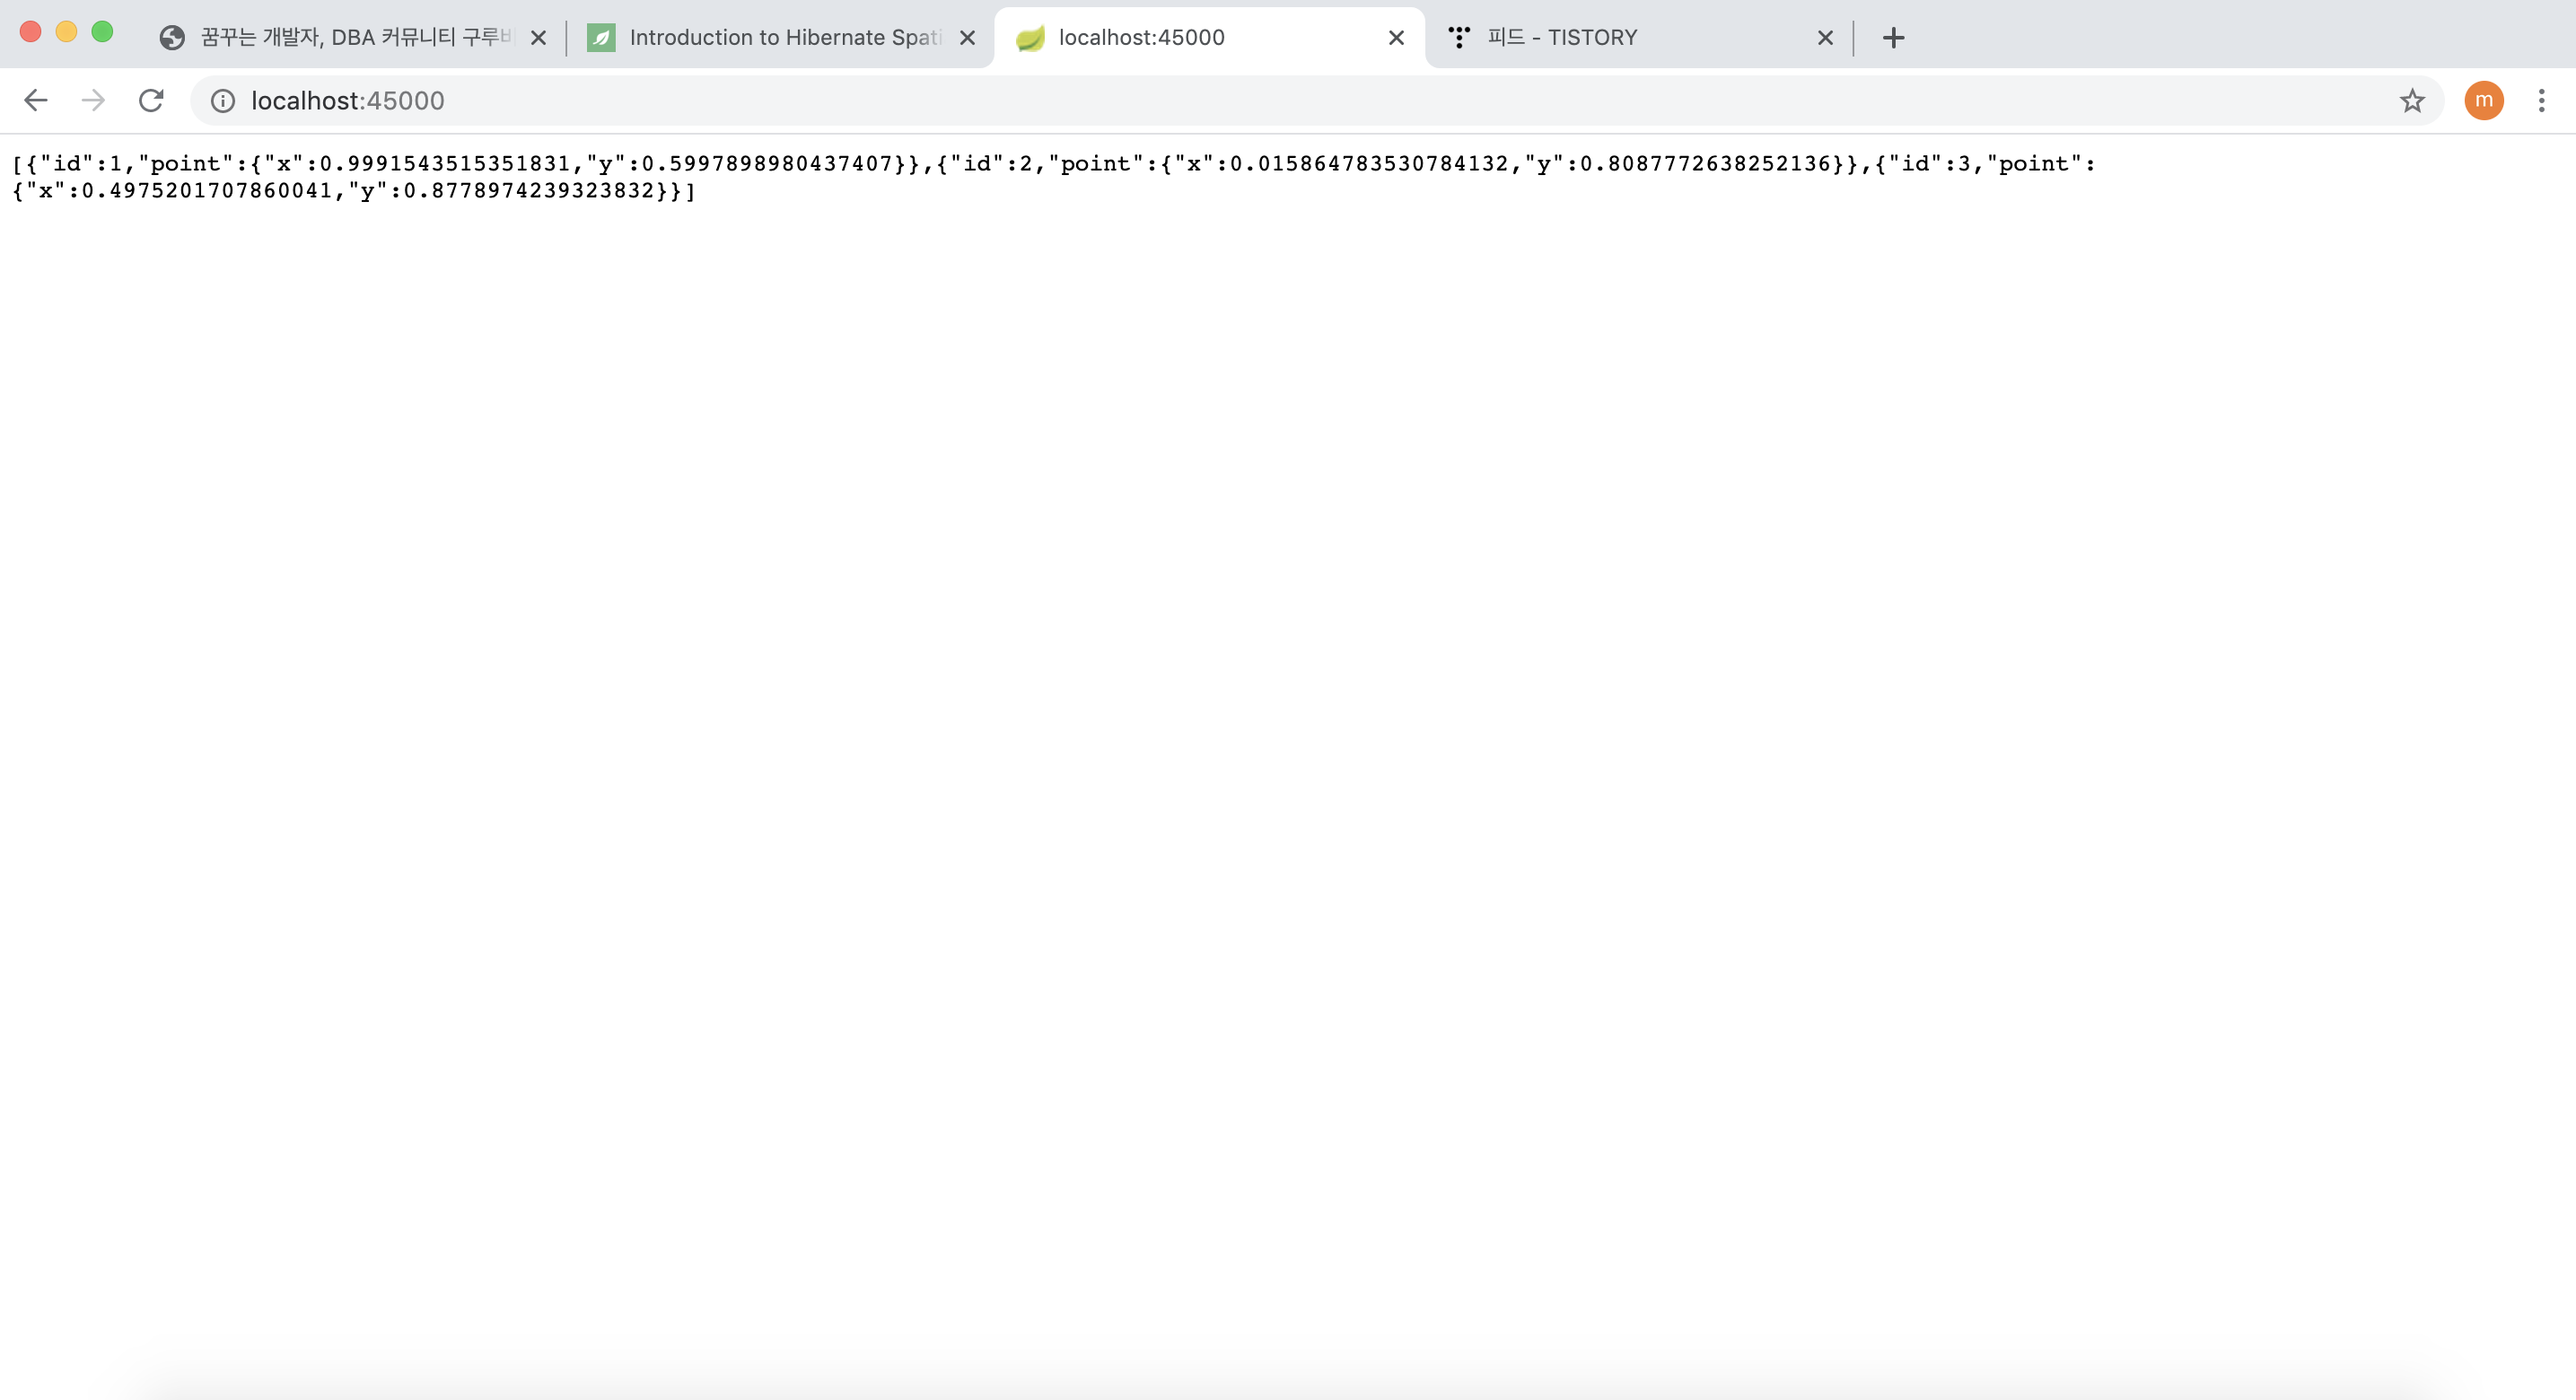
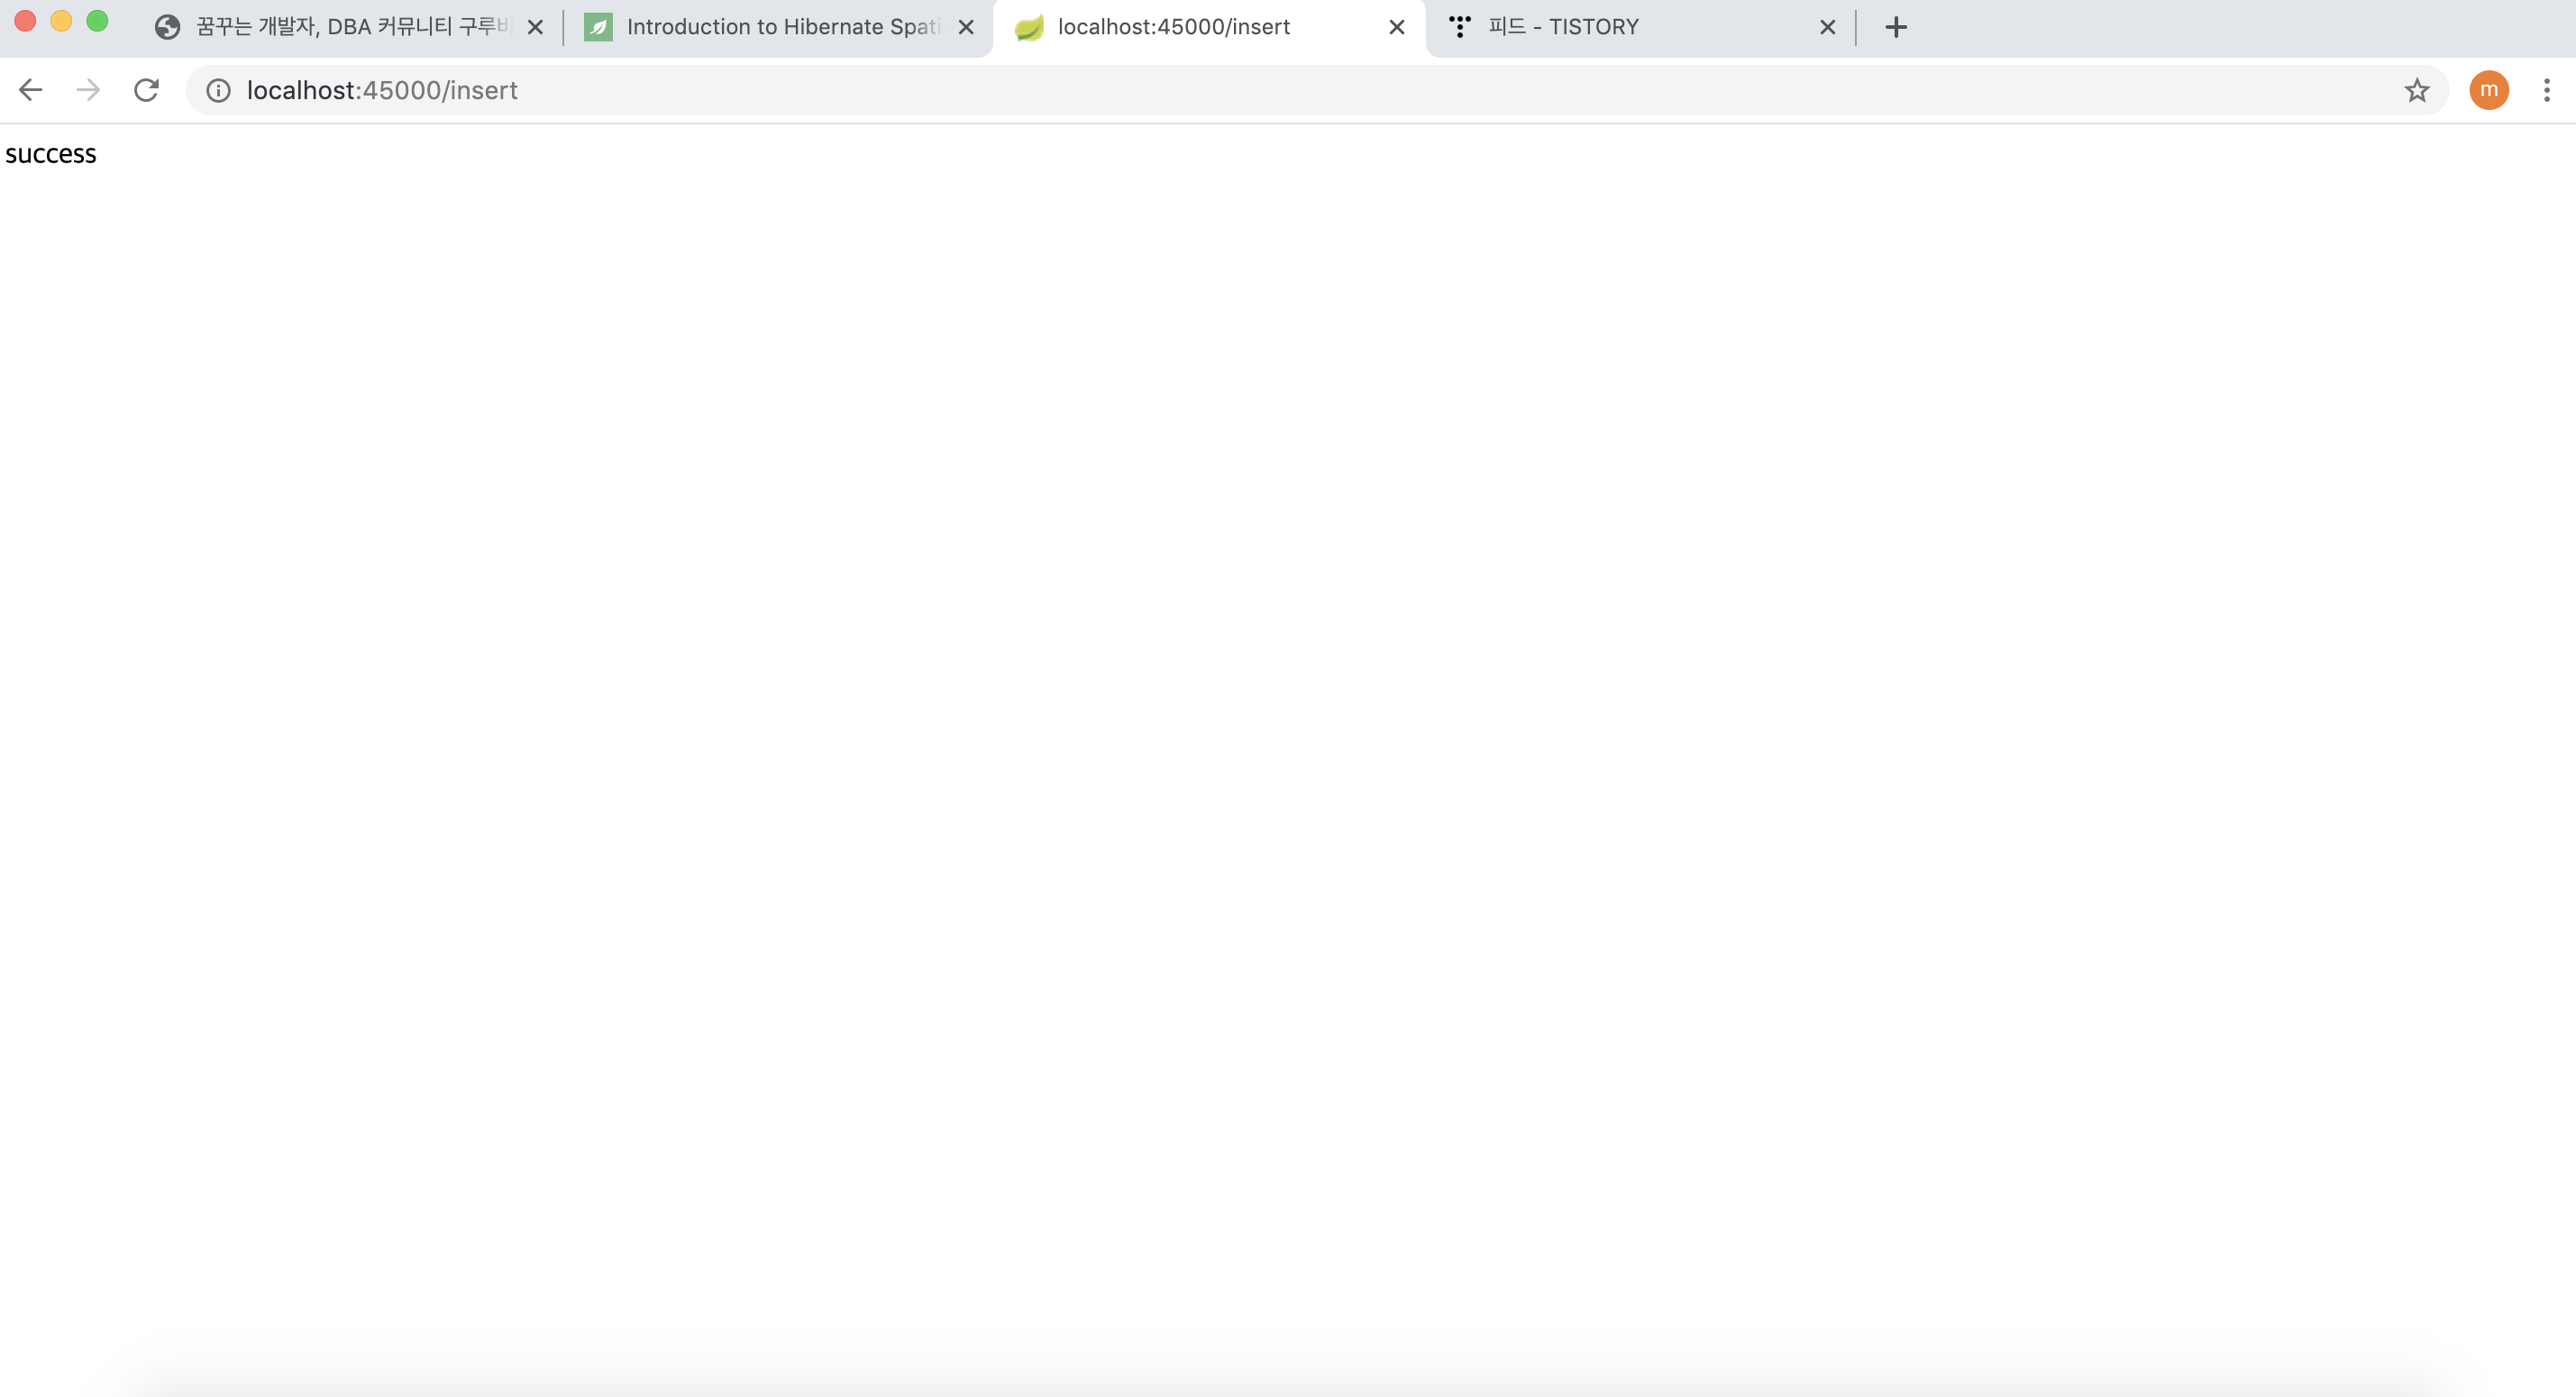
위의 컨트롤러에서는, "/insert" 페이지를 통해 랜덤으로 위도/경도 정보를 저장하고 "/" 페이지를 이용해서 지금까지 저장한 모든 위치정보(위도/경도) 들을 출력 해주는 역할을 수행하게 된다.
마지막으로 Main 함수를 아래와 같이 작성해준다.
package main.java;


import org.springframework.boot.SpringApplication;
import org.springframework.boot.autoconfigure.SpringBootApplication;

@SpringBootApplication
public class SpringGeometryExample {

    public static void main(String[] args) {
        SpringApplication.run(SpringGeometryExample.class, args);
    }
}
이제 실제로 위에서 작성한 예제를 실행해보도록 하자.
실행 결과
먼저 아래와 같이 /insert 페이지를 연속적으로 방문해서 위도/경도 데이터를 넣어주자.
그리고 아래 페이지를 방문하면 위도/경도 목록들을 얻을 수 있다.